How to make 3D paper stars

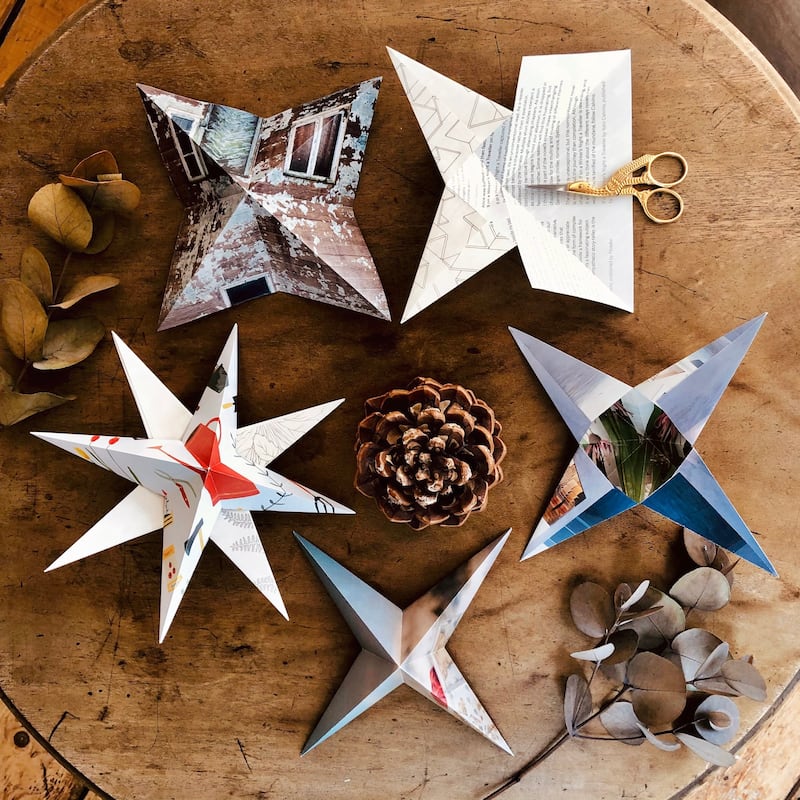
Nadine Guerlain is the illustrator and crafter behind Nadine Loves Paper. For Christmas she has designed a range of sustainable and plastic-free seasonal cards, paper craft kits, colour-in cards and advent calendars inspired by snowy winter nights, cosy animals and Scandinavian folk patterns. Here she shows you how to make 3D paper stars.
These are a great craft to add to any Christmas decor as you can make them in any size you like, and with any kind of paper you want as long as it is not too flimsy. I love using beautiful vintage magazine pages for crafting but you can also use craft or origami paper, old books, posters or packaging - making it a sustainable craft too.
You will need:
- Two square sheets of paper
- Scissors
- A glue stick
Method:
READ MORE
- Place a square of paper with the side that will be seen facing up. Fold it in half, open it up and fold in half again the other way. Open it up again and turn it over. Fold along one diagonal, open up and fold along the other diagonal. Open up your paper square one final time.
- Cut halfway along the lines created by the horizontal and vertical folds, on all four sides. With the side that will be seen facing down, create triangles by folding the paper from the tip of the corners to the diagonal fold lines.
- Overlap the triangles halfway over each other by gently shaping the points, and glue them together.
- Make a second star by repeating steps 1 to 3.
- Place your two stars back to back at a 45-degree angle to see where they overlap, and apply glue generously to that area on both stars. Gently press and hold them together for around 30 seconds to let the glue set.
When the glue is completely dry, simply display your finished paper stars on a mantelpiece or use them to decorate your table. You can also hang them individually or as a garland by threading string through them.
Instagram: @nadinelovespaper; Etsy: NadineLovesPaper.
How to make pom-pom baubles

With over 40,000 followers on Instagram, Joanne Mooney lives a creative lifestyle and is passionate about inspiring others to be creative. Obsessed with interiors and with making art, she has created a unique home in Dublin and teaches punch needle workshops. Here she shows you how to make simple, but delightful, pom-pom decorations for your Christmas tree.
You will need:
- Wool.
- Small sharp scissors.
- Milk/water bottle plastic lids.
- Metallic spray paint.
- Twine.
- A pom-pom maker.
- A drill or screwdriver.
- A darning needle.
Note: You can pick up wool cheaply in shops such as the Two Euro shop, Dealz and Mr Price so you don’t need to spend a huge amount of money. Pom-pom makers are available on my website or from Amazon. You’ll find spray paint at any good hardware shop.
Method:
- Collect plastic lids from milk or juice cartons or water bottles.
- Make lots of pom-poms. You can make different sizes and mix wool colours for a variety. The important part when making pom-poms is to trim them to get the perfect circle. To do this, pinch the pom-pom and trim any scraggly bits of wool.
- Spray the plastic lids with silver or gold spray paint. Do this outdoors or in a well ventilated area. Leave to dry.
- Using a drill and small drill bit, drill a small hole on the centre of the lid. If you don’t have a drill you can pierce a hole in the plastic lid with a screwdriver. With a darning needle, thread the twine up through the pom-pom and into the hole in the lid. Tie a tight knot. Make sure the twine is long enough to hang off a Christmas tree branch.
Top tips:
When making the pom-pom use lots of wool. The more wool you use, the thicker and fuller the pom-pom will be. A small sharp nail scissors is good for cutting and trimming the pom-poms.
joannemooney.ie; Instagram: @joannemooney
How to make a salt dough angel

Joanna Kaminska is the artist and designer behind the JOKAMIN brand. Born in Poland and based in Co Cork, Joanna “shoots from the hip and paints from the heart” and creates quirky, thought-provoking and at times nostalgic paintings, art dolls and accessories featuring her art.
You will need:
- A cup of flour
- A cup of salt
- Half a glass of water
- Small knife
- Sharp stick
- A little oil
Method:
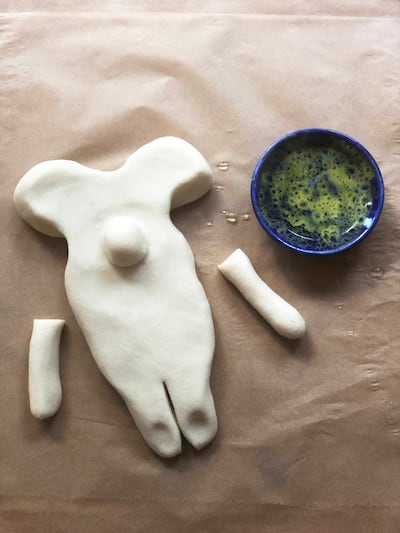
- Mix salt and flour and add water. Knead the dough. Smear the baking tray with the oil so the dough does not stick. When the dough is ready cut half of it and form a 10cm long roll (you will need it to form arms later). Put the dough on the tray.

- Squeeze it a bit to form the angel figure shape. Cut the lower part of the figure vertically in half to make legs (if you want to have them separated). To make feet, just press the end with your finger, and then tap it with a knife to create toes.
- I always stick the arms on later. You first roll two small pieces of dough, dampen the sides of the angel with the water in the desired place, then attach the arms.
- If you want to attach any hair or item of clothes, just always remember to wet the angel’s body before you stick on the next piece.
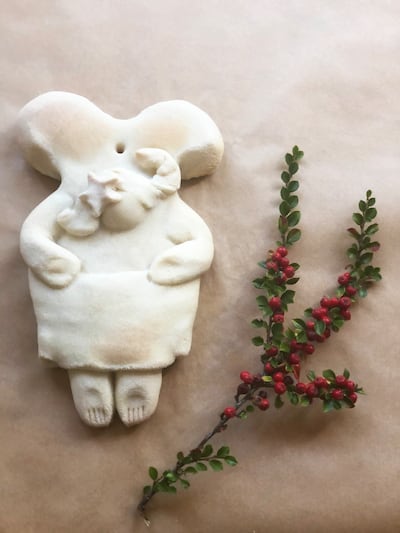
- Make a hole in the wings so you can hang it up when it’s dry. To make a smooth surface, dip your finger into the water and level it - NB not too much water.
- Put your angel into the oven and bake until golden brown (approx 20 to 30 minutes).

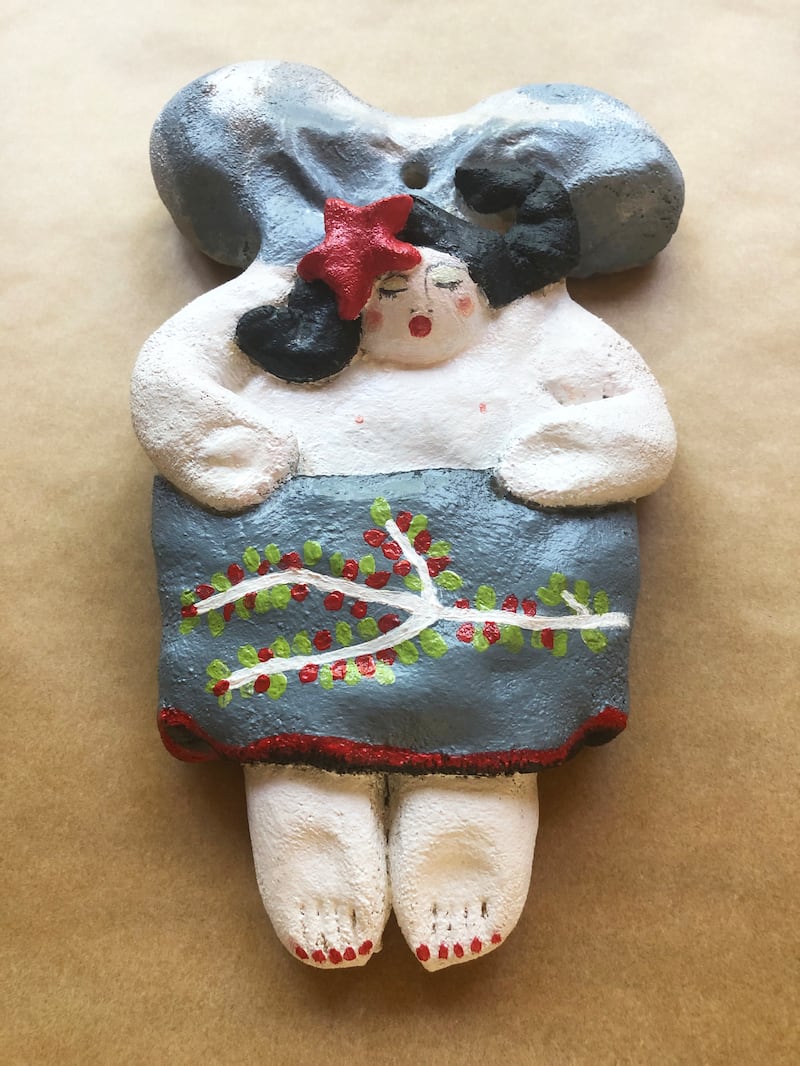
- Remove it from the oven when ready and leave it to cool down. When it is cold, use acrylic paint to paint your angel and spray it with protective varnish at the end if you have some.
Website: jokamin.com Instagram: @jokaminart


